1. Using eProsima Shapes Demo
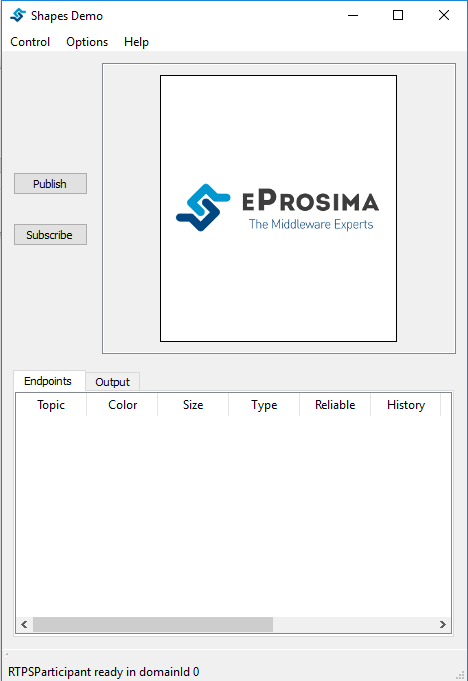
This section serves as a guide to the main menus of eProsima Shapes Demo application. After the executable is launched, a window similar to the one presented in the following image should be displayed.
1.1. Publishing a Topic (Shape)
The Publish button allows users to define the Shape (topic) and Quality of Service (QoS) for their publication. The following image shows an example of the Publication menu.

There are multiple parameters that the user can define in this menu:
Shape: This parameter defines the topic where the publication is going to occur. Three different shapes can be published:
Square,CircleandTriangle(see Fast DDS Topic Documentation).Color: The user can define the color of the shape. This parameter will be used as key; that is, a way to distinguish between multiple instances of the same shape (see Fast DDS Topics with key documentation).
Size: This parameter allows to control the size of the shape. The size can vary between
1and99.Partition: The user can select different partitions to differentiate groups of publishers and subscribers. The user can select between four partitions (
A,B,CandD). Additionally the user can select the*partition, that will be matched against all other partitions (see Fast DDS Partitions Documentation).Note
Using the wildcard (
*) partition is not the same as not using any partition. A publisher that uses the wildcard partition will not be matched with a subscriber that do not defines any partitions.Reliable: The user can select to disable the
Reliablecheck-box to use aBest-Effortpublisher (see Fast DDS ReliabilityQosPolicy Documentation).History and Durability: The publishers’s History is set to
KEEP_LAST. The user can select the number of samples that the publisher is going to save and whether this History is going to beVOLATILEorTRANSIENT_LOCAL. The latter will send that last stored values to subscribers joining after the publisher has been created. (see Fast DDS DurabilityQosPolicy Documentation).Data Representation: The Data Representation QoS Policy is set to
XCDR(version 1), but the user can optionally select theXCDR2Data Representation. (see Fast DDS Data representation Documentation).Liveliness: The user can select the Liveliness QoS of the publisher from three different values:
AUTOMATIC,MANUAL_BY_PARTICIPANTandMANUAL_BY_TOPIC. The Lease Duration value and Announcement Period can also be configured. The latter only applies if Liveliness is set toAUTOMATICorMANUAL_BY_PARTICIPANT(see Fast DDS LivelinessQosPolicy Documentation).Ownership: The Ownership QoS determines whether the key (color) of a Topic (Shape) is owned by a single publisher. If the selected ownership is
EXCLUSIVEthe publisher will use the Ownership strength value as the strength of its publication. Only the publisher with the highest strength can publish in the same Topic with the same Key (see Fast DDS OwnershipQosPolicy Documentation).Deadline: The Deadline QoS determines the maximum expected amount of time between samples. When the deadline is missed the application will be notified and a message will be printed on the console (see Fast DDS DeadlineQosPolicy Documentation).
Lifespan: The Lifespan QoS determines the duration while the sample is still valid. When a sample’s lifespan expires, it will be removed from publisher and subscriber histories. (see Fast DDS LifespanQosPolicy Documentation).
Note
Using Lifespan QoS will not have any visual effect.
1.2. Subscribing to a Topic (Shape)
When the Subscriber button is pressed, a new window appear to allow the user to define the Shape (topic) and Quality of Service (QoS) for its subscription. The following image shows an example of the Subscribe menu.
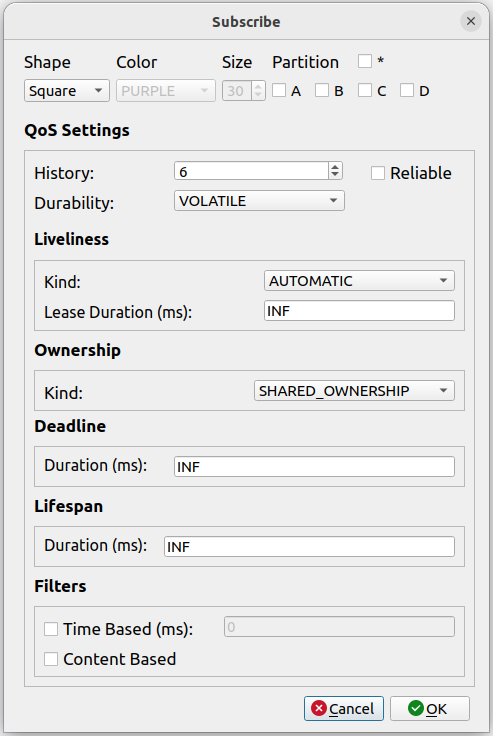
This menu is highly similar to the Publication menu but the user cannot change the color and size of the Shape, and it has additional elements:
Liveliness: This QoS policy is applied in the same way as in the publisher except for the Announcement Period, which does not apply for the Subscriber (see Fast DDS LivelinessQosPolicy Documentation).
Time Based Filter: This value can be used by the user to specify the minimum amount of time (in milliseconds) that the subscriber wants between updates. (see Fast DDS TimeBasedFilterQosPolicy Documentation).
Content Based Filter: This filter draws a rectangle in the instances window. Only the shapes that are included in this rectangle are accepted while the rest of them are ignored. The user can dynamically resize and move this content filter.
Note
Using Lifespan QoS will not have any visual effect.
Note
The data reader of a subscriber can receive data sent using both representation versions, XCDR and XCDR2.
1.3. Participant configuration
The eProsima Shapes Demo application allows the user to define Participant policies. To see the Options window, please go to Options->Participant Configuration in the main bar. The following image shows the Options Menu.

Transport Protocol: You can select between UDP protocol, TCP LAN Server, TCP WAN Server or TCP Client, and Shared Memory protocol.
UDP: With UDP Protocol the application will work sending multicast packets to communicate with other apps. (See Fast DDS UDP Transport Documentation).
TCP: TCP protocol needs a minimal configuration to create the connection between the machines: (See Fast DDS TCP Transport Documentation).
If the application is going to run as a LAN server, it only needs to set the listening port where it is going to accept connections (note that firewall must be configured to allow inbound traffic).
If the application is going to run as a WAN server, it needs to set the listening port where it is going to accept connections and the server WAN address (note that firewall must be configured to allow inbound traffic and router must relay listening port traffic to server machine).
If the application is going to run as a client it needs to know the IP address of the server (or its WAN address if both instances don’t share network) and the port where the server is listening for connections.
Shared Memory (SHM): Activating Shared Memory protocol will use the Shared Memory Transport, a Fast DDS feature that allows a faster and more efficient communication for Participants running in the same host. (See Fast DDS Shared Memory Transport Documentation).
Default In case no transport has been activated, Fast DDS default transports will be used (UDP + SHM) (See Fast DDS Transports Documentation).
Same host delivery: Fast DDS has some features that allow Participants running in the same host or process to share resources in order to improve the communication:
Intraprocess: Allow using Intraprocess delivery when both Endpoints are running in the same process. (See Fast DDS Intraprocess Documentation).
Domain: The user can select different Domain IDs. Shapes Demo instances using different Domain IDs will not communicate. To modify the Domain ID the user needs to stop the participant (thus removing all existing publishers and subscribers) and start a new one with the new Domain ID. (See Fast DDS Domain Documentation).
Statistics: The Fast DDS Statistics module is enabled by default, allowing the collection and analysis of various instrumentation data through the Fast DDS Statistics Backend and its representation in the Fast DDS Monitor. This module requires to have compiled Fast DDS with Statistics Module ON.
Active Statistics: Activate the DataWriters which publish the data referred to the Statistics Module DDS Layer. (See Fast DDS Statistics Module DDS Layer Documentation).
Active Monitor Service: Activate the DataWriters which publish the data referred to the Monitor Service Status Topic. (See Fast DDS Monitor Service Documentation).
Advanced options:
Autofill type information: Whether the discovery packages automatically propagate the type information.
Enable UDP Sample Loss: A percentage of samples sent by the publisher is intentionally lost. This feature allows the user to simulate network conditions where a certain amount of data loss occurs. The percentage of samples to be lost can be configured by the user. If Active Monitor Service was enabled and Fast DDS was compiled with Statistics Module ON, the lost samples are reported in Fast DDS Monitor.
In case that the Participant is already running, it should be stopped in order to change its configuration. This will drop every endpoint already created.
1.4. Preferences
The eProsima Shapes Demo application allows the user to define additional options. To see the Options window, please go to Options->Preferences in the main bar. The following image shows the Options Menu.
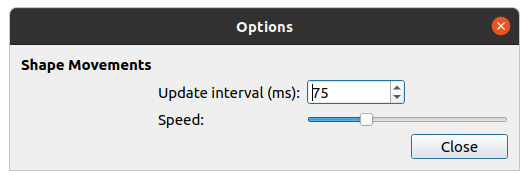
The user can customize several aspects of Shapes Demo operation:
Update interval: This value changes the publication period for all the publishers.
Speed: This scroll bar allows the user to change how much the Shape moves between two write calls.
Invert Y axis: This checkbox inverts the Y axis visually, it does not modify the underlying value.
1.5. Endpoints and Output tabs
A table including all created endpoints is also provided. An example of this legend is shown in the following figure.

This table can be used to remove endpoints.
Multiple endpoints can be selected at once using standard selection controls
(Ctrl+Click to toggle individual rows, Shift+Click to select a range).
Two methods are provided to delete the selected endpoint(s):
Right-click context menu: Right-clicking on an endpoint row shows a Delete Endpoint option. If the right-clicked row is not already part of the current selection, it becomes the sole selected row before the menu appears. If one or more rows are already selected and the right-clicked row is among them, the entire selection is deleted when the option is chosen.
Delete key: Pressing the
Deletekey removes all currently selected endpoints at once.
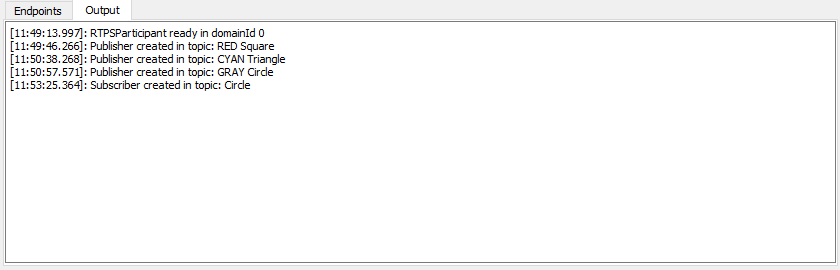
The output tab shows the output log messages. An example of the output tab is shown in the figure below.